CORRECT TEXT
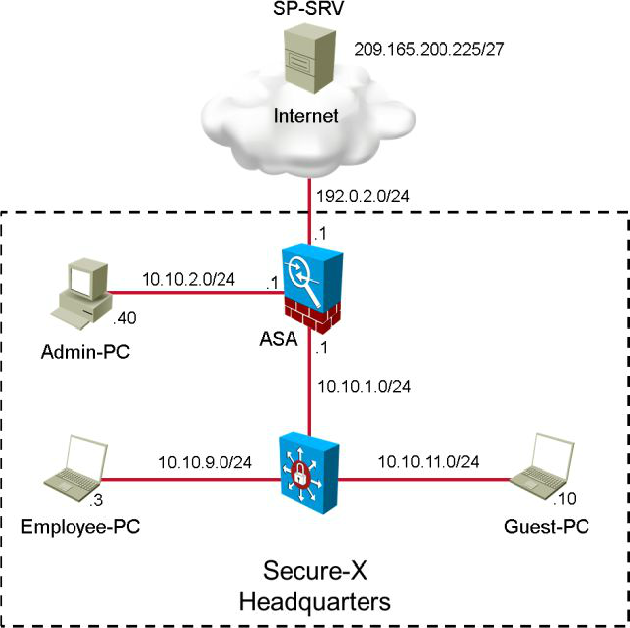
You are a network security engineer for the Secure-X network. You have been tasked with implementing dynamic network object NAT with PAT on a Cisco AS
A . You must configure the Cisco ASA such that the source IP addresses of all internal hosts are translated to a single IP address (using different ports) when the internal hosts access the Internet.
To successfully complete this activity, you must perform the following tasks:
– Use the Cisco ASDM GUI on the Admin PC to configure dynamic network object NAT with PAT using the following parameters:
– Network object name: Internal-Networks
– IP subnet: 10.10.0.0/16
– Translated IP address: 192.0.2.100
– Source interface: inside
– Destination interface: outside
NOTE: The object (TRANSLATED-INSIDE-HOSTS) for this translated IP address has already been created for your use in this activity.
NOTE: Not all ASDM screens are active for this exercise.
NOTE: Login credentials are not needed for this simulation.
– In the Cisco ASDM, display and view the auto-generated NAT rule.
– From the Employee PC, generate traffic to SP-SRV by opening a browser and navigating to http://abc.com.public.
– From the Guest PC, generate traffic to SP-SRV by opening a browser and navigating to http://abc.com.public.
– At the CLI of the Cisco ASA, display your NAT configuration. You should see the configured policy and statistics for translated packets.
– At the CLI of the Cisco ASA, display the translation table. You should see dynamic translations for the Employee PC and the Guest P
B . Both inside IP addresses translate to the same IP address, but using different ports.
You have completed this exercise when you have configured and successfully tested dynamic network object NAT with PA
C . 
Answer: See the explanation for detailed answer to this sim question.
Explanation:
First, click on Add C Network Objects on the Network Objects/Groups tab and fill in the information as shown below:
\psfHome.TrashScreen Shot 2015-06-17 at 5.19.15 PM.png
Then, use the advanced tab and configure it as shown below:
\psfHome.TrashScreen Shot 2015-06-17 at 5.17.53 PM.png
Then hit OK, OK again, Apply, and then Send when prompted.
You can verify using the instructions provided in the question